Traditional Baklava
So, you invite some friends over to your place for dinner and you want to make them something different, dellicious and extravagant! If you have time you should totally try this recipe to blow their mind!
Baklavas is a buttery, very rich in flavour pastry which is consisted of many layers of crunchy phyllo dough.
Baklavas was first seen in Middle East and it's a very famous dessert both in Greece and Turkey. Baklavas is a combination of phyllo dough, walnuts (you can also find it in different versions with peanuts or hazelnuts - in Greece we usually make it with walnuts) and sugar syrup.
It's a little bit time consuming recipe (the preparation time is almost three hours) but it's totally worth it!
Ingredients:
- Half a kilo of phyllo dough
- 400 grams of melted butter
- One tablespoon of ground cinnamon
- 400 grams walnuts (or you can try 200 grams walnuts and 200 grams almonds)
- 50 grams breadcrumbs
For the sugar syrup:
- 600 grams granulated sugar
- 400 ml water
- 60 grams of corn syrup
- Three whole cloves
- One whole orange cut in half
- One cinnamon stick
The magic method:
-
We preheat the oven to 150ºC (300º F)
-
The first thing we do is the syrup. Place the pot over high heat and drop the sugar, the water, the cinnamon stick, the cloves and the orange. Let the mixture boil and stir. A soon as the sugar melts, remove from the heat and let it aside to cool completely. Discard the orange halves before you use the syrup. The syrup must be cool when we pull it on the baklava in order to achieve the crunchy texture!
-
The next step is to make the filling! Take the food processor and put inside it the walnuts, the breadcrumbs, the ground cloves and the ground cinnamon. Beat them for almost one minute, until they are broken down. Transfer the filling to a bowl.
-
Brush a 35x25 cm baking pan with butter. Don't be afraid to use a lot of it!
-
Put the baking pan in front of you so that the long side is directly in front of you and begin to spread the phyllo dough into the pan to create the bottom crust.
-
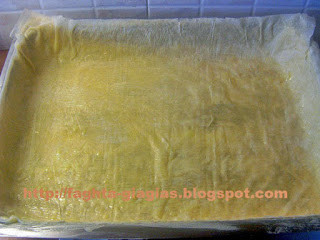
Then, carefully spread the first sheet of phyllo dough into the pan, making sure that covers the 2/3 of the pan and letting the long ends hang over the edges of the pan. Press down the phyllo dough with your hands to spread it out nicely all the way to the corners of the pan. But be careful and gentle!

The phyllo dough as it should look like.
-
Repeat the same process with the second sheed of phyllo dough, but this time start spreading it on the other side of the pan, slightly covering the first sheet. Drizzle the phyllo dough with butter but do not brush the butter directly onto it (this way the phyllo dough will be much more crunchy! )
- Spread the third sheet of phyllo dough directly over the first two layers, and make it fit nicely in the pan all the way to the edges of the pan.
- Sprinkle almost a handful of the filling over them.
- Spread the fourth sheet of phyllo dough, directly into the pan, exactly like we did with the previous one. Make sure it covers the filling!
- Then drizzle with butter.
- Sprinkle a handful of the filling over it.
- Add another sheet of phyllo dough, and place the two top corners of the phyllo dough at the top corners of the pan and let the other end hang over the pan, directly in front of you.
- Drizzle again with butter and sprinkle a handful of the filling over it.
- Add another sheet of phyllo dough, but this time place the two top corners of the phyllo dough at the bottom corners of the pan, the one are directly in front of you and let the other end hang over the pan, which is away from you.
- Then drizzle one more time with butter and sprinkle a handful of the filling over it.
- Repeat the same process with all but three of the remaining sheets of phyllo dough (this will be used to make the top crust). Just make sure that you add all the filling!
- Fold over the overhanging ends of the phyllo dough and drizzle with some butter.
- Add two of the three remaining sheets of phyllo dough in half in order to fit nicely in the pan without any ends hanging over. Drizzle again with some butter.
- Then spread the final sheet (yaaay! ) nicely over the top, covering the whole pan.
- Carefully use your brush to tuck it in all around the sides of the baklava, creating a nice top layer!
- Add all of the remaining butter over the top and now you can brush it over the phyllo dough.
- Place the baking pan with the baklava in the fridge for twenty minutes to chill.
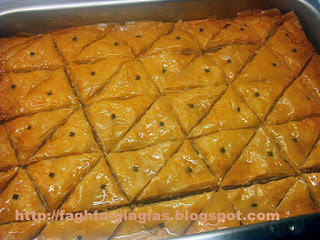
- After the twenty minutes, remove and score the top with a sharp knife, creating diamond shaped pieces. Be careful! Do not score all the way down. The baklava should look like the photo below!

The diamond shaped pieces.
And the final step!
-
Bake it for two hours (or maybe two hours and thirty minutes) until it gets golden and super crunchy!
-
When the baklava is ready, remove it from the oven and immediately pour the cold syrup over it.
-
Set it aside to soak up all the sugar syrup and cool.
-
When it's ready, cut in pieces and serve!
Enjoy!
Tip: The secret to a delicious and super crunchy balkava is to add the cool syrup when the baklava is still very hot.

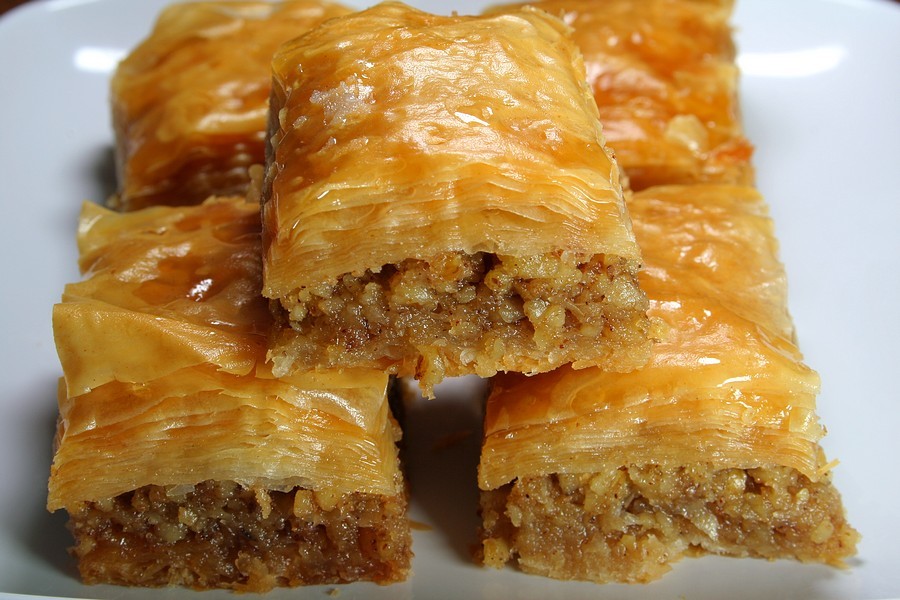
A final view of your baklava with walnuts!

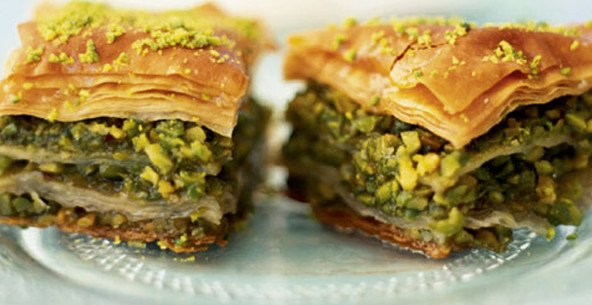
A final view of your delicious baklava with peanuts.
Photo gallery
Content available in other languages
- Italiano: Baklava Tradizionale
- Português: Tradicional Baklava
- Español: Baklava tradicional
- Polski: Tradycyjna Baklawa
Want to have your own Erasmus blog?
If you are experiencing living abroad, you're an avid traveller or want to promote the city where you live... create your own blog and share your adventures!
I want to create my Erasmus blog! →


Comments (1 comments)
I just love baklava. I learned the recipe from a Turkish friend. I also make the dough from scratch. I also liked your recipe.