Khinkali. The Famous Georgian Cuisine

Hi guys, Its been few days since I've written something on my blog. Hope you are all doing well as usual. Today I would like to share with you all a most popular dish in Georgian cuisine called as Khinkali. Even in Chennai, the city that I live in India has a similar kind of dish called "Kolukattai" which is a sweet that is made during special occasions. This sweet is made especially for Lord Ganesh or Vinayakar in my language as it is believed to be his favorite food. Even in the images of Lord Vinayakar you can see this food lying near his feet. When I first saw this dish in hotel this was the thing that first striked in my mind. Later when I tried eating Khinkhali I recognized that it was not a sweet but it is a traditional and a most popular food in Georgia. Khinkali first originated in Georgia however this food item is also available in some of the other Caucassian countries. Only very recently I came across the art of making this popular dish which I would like to share with you all here.
Khinkali is actually made of dough which is made in the form of a sack inside of which contains a juicy meat filling. Each region of Georgia have their own method of preparing the fillings. The meat used may vary between pork, beef, lamb (in mountain regions), Imeretian cheese, mushrooms, mashed potatoes etc. Khinkali's with parsley are called Kalakuri Khinkali (city khinkali) and those without parsley are called Khevsuruli Khinkali. Georgian love Khinkali so much that everyone will eat a lot, may be around 20 I'm not sure of the number. I'm writing the process in the same way my neighbor prepared the dish.
The main ingredients that is used to make thirty pieces of this popular Georgian dish are as follows.
- Flour - One and Half Kilo (for dusting and to prepare the dough)
- 2 Eggs
- Warm Water - Half Liter
For preparing the filling you will need the following ingredients:
- Minced Pork and Beef mix - 700grams
- Salt - To taste
- Dry Red Pepper - Half teaspoon
- Caraway seeds - Quarter teaspoon
- 2 finely chopped onions (optional)
- Water - Half liter
For boiling the khinkali's you will need water, salt and a cooking pot.
Lets now see how my neighbor prepared these Khinkali's.
Add a kilogram of flour to a mixing bowl and then break open the two eggs into the flour. Add the warm water that you have and mix it well until a dough ball is made from the flour. Once you get your dough ball cut it into two pieces such that you have two pieces of dough balls. Dust a work surface with flour and take a single ball of dough and dust it with flour as well. Now start kneading the dough very firmly until the dough becomes extremly soft. Keep on kneading and folding the dough. Remember that the softness of your Khinkali's depend on your kneading skills. After kneading roll the dough using a rolleing pin into a circle which is a bit thick (say it to be a quarter inch thick). Take a glass with a circular mouth and cut the rolled dough into circles. Now remove the excess dough from your working surface such that you have only the small circles of dough on the table. Again use a rolling pin to spread the small circles of dough in which you will be placing your filling. Continue the process with other dough circles until you spread them all after which you will be making the filling to be placed.
To make the filling add the above mentioned ingredients like the meat, spices, onions which is optional and salt in a bowl. Add a small amount of water and then mix the mixture well. Keep adding water little by little and each time you add water you should mix it well with the rest of the mixture. Continue the process until you have the entire half liter of water mixed with the mixture.
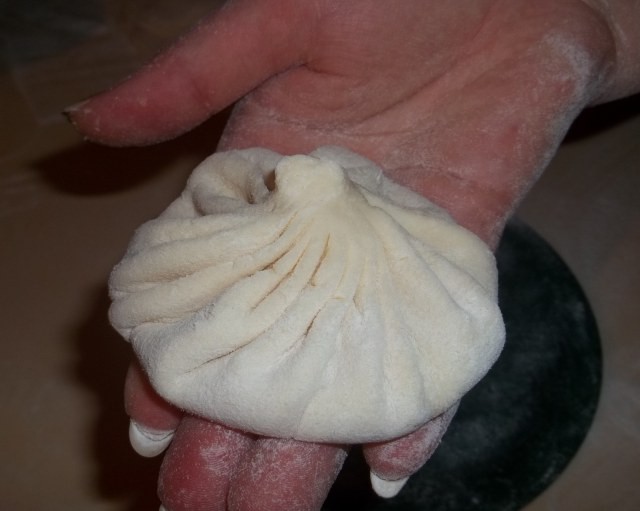
Now take a piece of rolled out khinkali spread and add a tablespoon of the meat mixture on the dough. After placing the mixture in the dough you should gather the ends of the dough piece such that it forms a sac lie structure. It is a bit difficult process but it becomes easy as you practice. You have to make somewhere between 15 to 20 folds with each dough. The top portion will be thick as it contains the collected dough from all the ends. Pinch the top portion of the dough off leaving only a small part of it on the top. As you finish making one khinkali place it in a plate that is dusted with flour so that it doesn't stick and continue making the others in the same way.
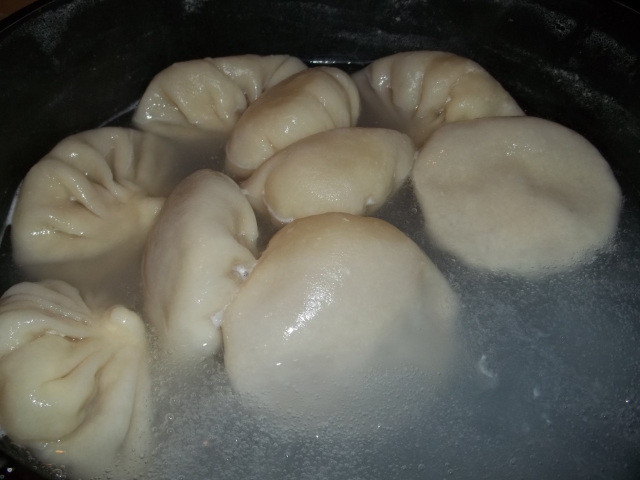
Heat the water and salt in a vessel and brink it to a boiling point. Place the Khinkalis that you made inside the boiling water carefully without breaking it. Continue boiling the Khinkali for 15 minutes without letting it to break open.
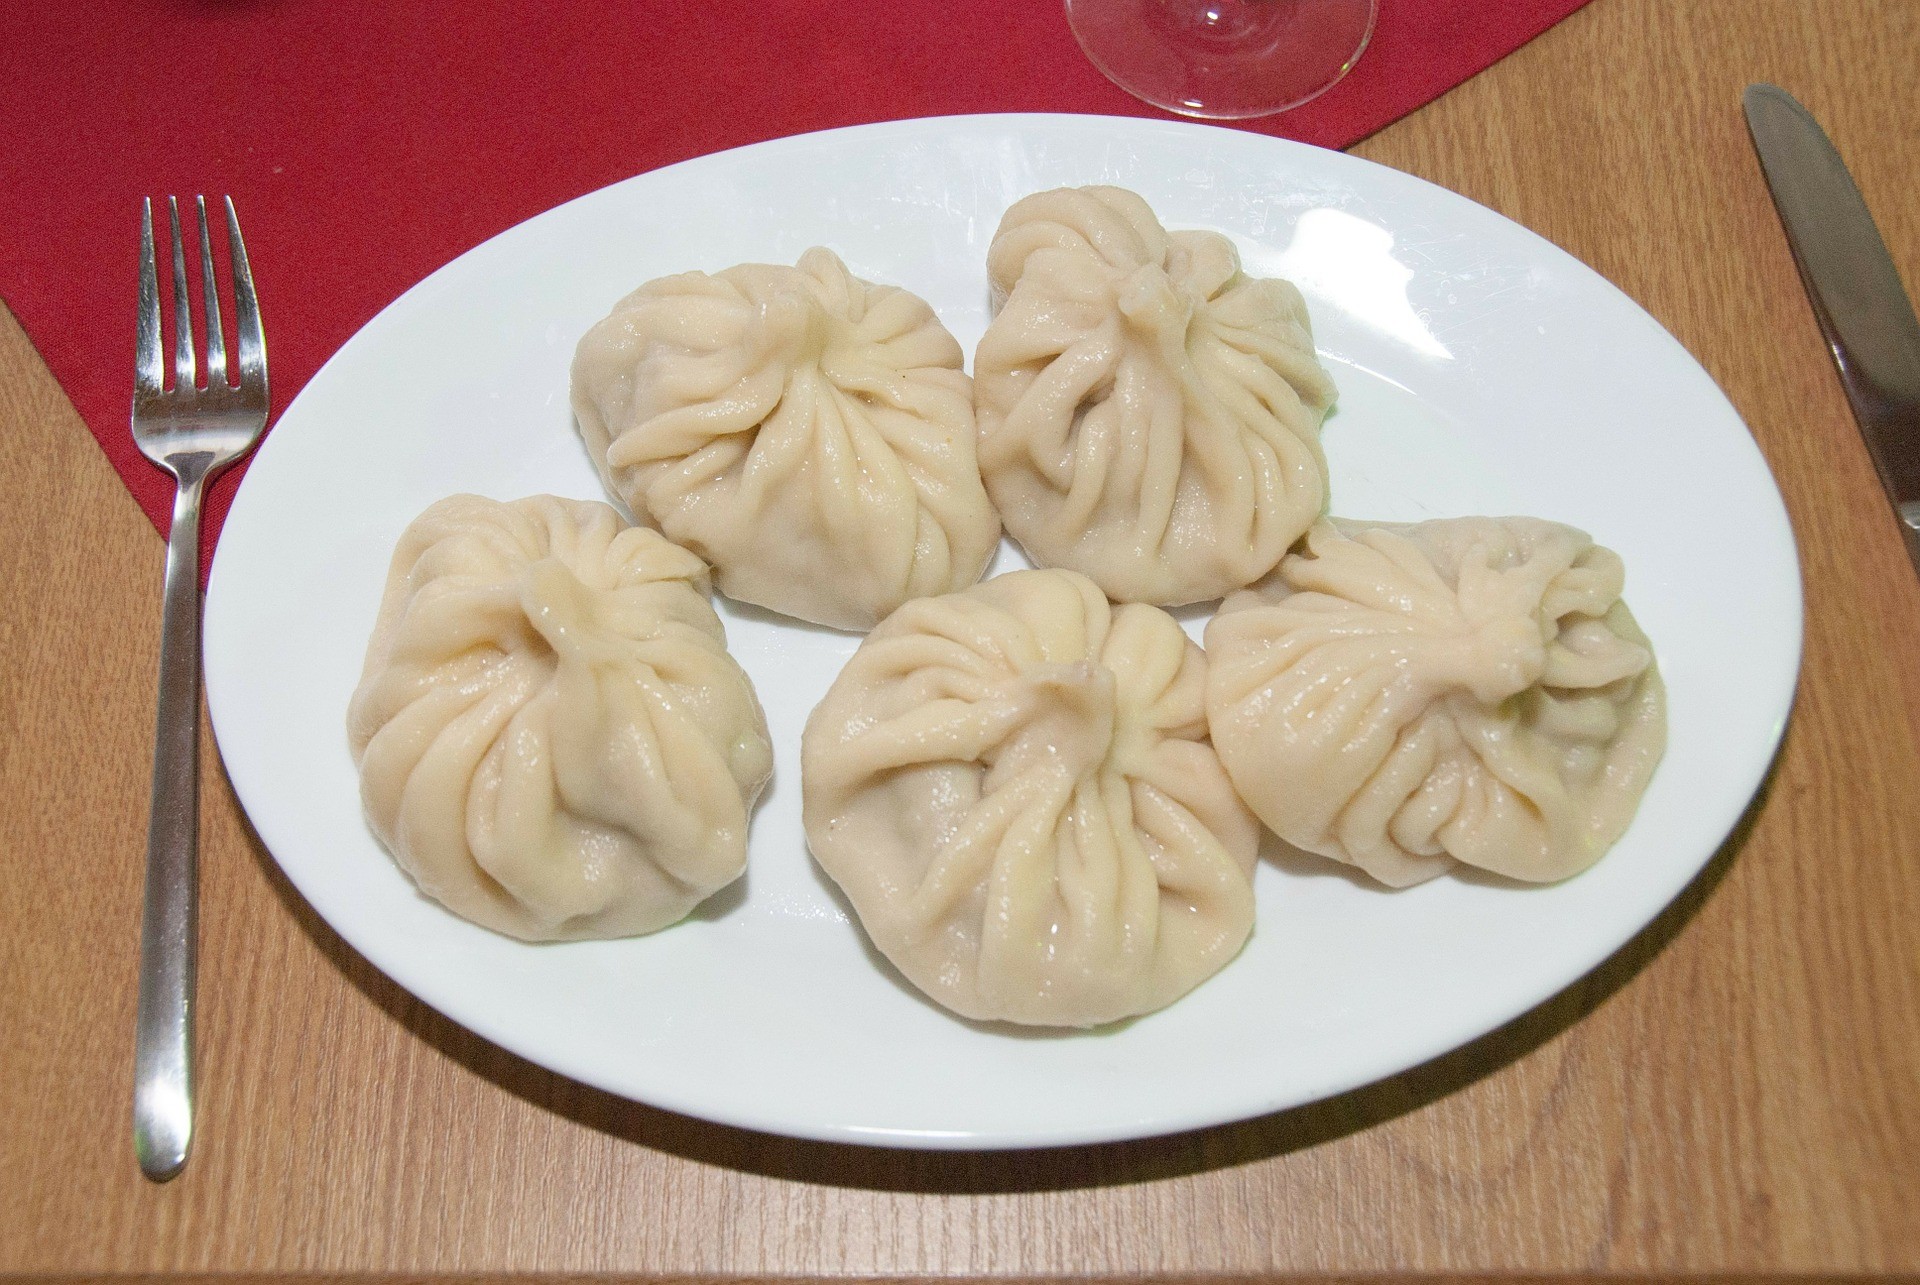
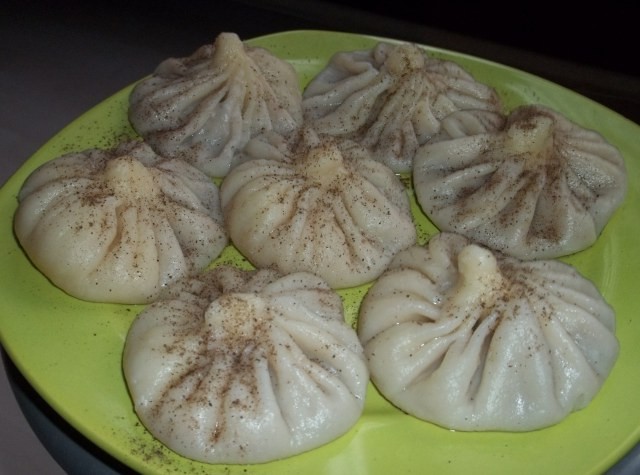
After its cooked take them carefully place it on a plate. Sprinkle some black pepper on the top of Khinkalis and your dish is ready to serve.
There is also a traditional way of eating Khinkalis. The top point where you get the thick dough is not eaten. This is called khuti (hat) or Khuchi (belly button). It is used as a place to hold the hot khinkalis. Once you take your first you should suck out the juice from the khinkali and then eat the remainder of it. The khuti is used to keep a count of the number of Khinkalis a person has eaten.
It is a delicious Georgian food which is a traditional and having its own way not only to prepare but also to eat. It is a must to try this dish if you visit Georgia or you may even try this at your home as the ingredients are not hard to find. In Georgia there are even ready to eat Khinkalis available which you just have to boil in water but it won't be that delicious as the homemade khinkalis. I think that you would like this dish either. Till I write my next article keep smiling and cheers friends. If you need any clarification regarding the process of making this dish or if you have any suggestions please feel free to post them below. Thank you for reading patiently!
Photo gallery
Content available in other languages
- Español: Famosa receta georgiana: el khinkali
Want to have your own Erasmus blog?
If you are experiencing living abroad, you're an avid traveller or want to promote the city where you live... create your own blog and share your adventures!
I want to create my Erasmus blog! →


Comments (0 comments)